Week 6: Elegant – Mini Blackberry Tarts

Tiny deserts alway look more elegant. Especially pastries, or tarts. I thought these were so pretty when I saw them over at Pham Fatale. And they were surprisingly easier to make then they appeared.

I love tarts, but I love mini tarts more! They are so dainty and cute. And you don’t have to bust your whole diet with dessert. When I walked into Williams-Sonoma last Tuesday afternoon, I knew I’d be making these for dinner that night.

Because that is when I found this

How awesome is this?? I was in love, and for under $30!

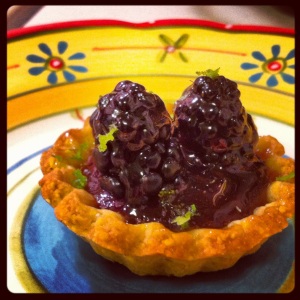
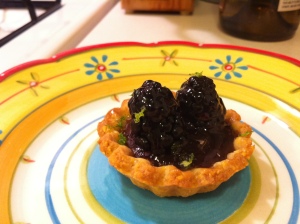
So on to the tarts! The shell is made from a sweet polenta dough, then filled with blackberry preserves, and baked, then immediately topped with a blackberry (or two!) Finally, painted with a lime ginger glaze and a sprinkle of lime zest.

To get started, whisk the egg and 2 Tablespoons of sugar with a mixer until they turn pale, and foamy. Add vanilla.


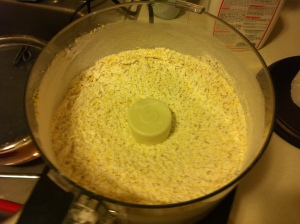
Then paint the inside of your food processor with some oil using a pastry brush. Add flour, sugar, polenta, baking powder and salt.


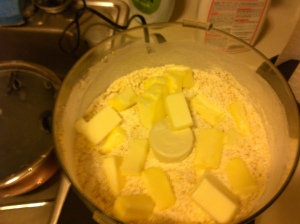
Add cold butter chunks

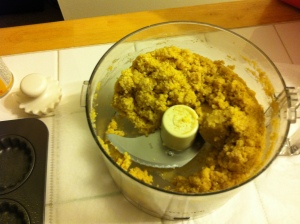
Pulse mixture until it forms course crumbs, add the egg mixture and pulse a few more times until the dough forms, but do not over mix.

Now knead the dough a bit and roll out to about 1/4 inch thick and fill tart pan. If you are making a large sized tart, I would suggest rolling the dough out a little bit thicker. No more than a 1/2 inch thick. Press dough into greased tart pans.

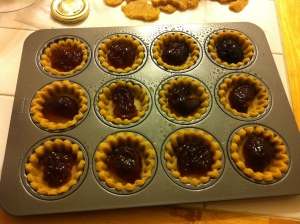
Now fill shells with preserves. I used about 1 tablespoon per shell.  You can use any flavor combination that you like. This would work well with raspberries or strawberries as well.

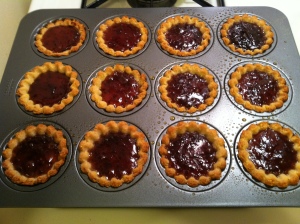
Place in oven for about 15 minutes, or until dough starts to turn golden on the edges.

Once the tarts are out of the oven, immediately place berries on top of each tart. Then paint with glaze using a pastry brush. Allow to cool completely before serving, to give the jelly time to set. For the glaze I used a quarter cup of lime marmalade, and grated about 1/4 teaspoon of ginger. Cook in a saucepan until the marmalade liquifies, then gaze the tarts. Grate some lime zest over the top of each tart. Allow to cool.

These came out so delicious, I will DEFINITELY be making them again!


  • 1-1/2 cups all-purpose flour, + 2 tablespoons for the filling
  • 3/4 cup coarse polenta
  • 1 drizzle canola oil, for greasing the food processor
  • 1/8 teaspoon salt
  • 1-1/3 teaspoons baking powder
  • 1 egg
  • 2 cups sugar, + 2 tablespoons for the egg
  • 8 tablespoons unsalted butter (cold), diced
  • 1-1/4 cups blackberry preserves
  • 1 pkg fresh blackberries
  • 1/4 cup lime marmalad
  • 1/4 teaspoon fresh grated ginger
  • zest from one lime
Week 5: Breakfast – Savory Breakfast Muffins

Breakfast, they say it’s the most important meal of the day! But I am not a morning person. So I would rather sleep till the very last minute, instead of getting up earlier and preparing something. These muffins are great because they can be frozen! Then just grab one on the way out and heat it up when you get to the office! I found this recipe over at The Comfort of Cooking through Food Gawker (my favorite site ever!!)

I would recommend making these more than once. Maybe halve the batch initially, as a test batch and then customize the spices to suit your tastes. I found that these could benefit from the addition of more chili powder, or possibly a a flowered or spicy sausage. Also, I would like to experiment with sautéing the onions in butter beforehand, to add another layer of flavor (read: fat).

Here’s the directions:

All the stuff you need!

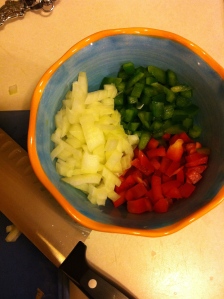
Dice up the onion, and both peppers

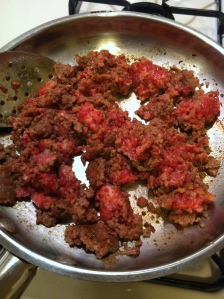
Then brown the sausage in a pan with the chili powder, salt and pepper. Then drain grease on a paper towel.

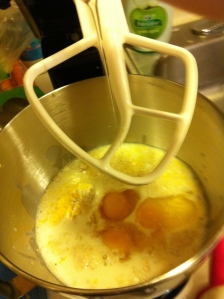
Mix together bisquick, cornmeal, eggs, garlic powder and milk.

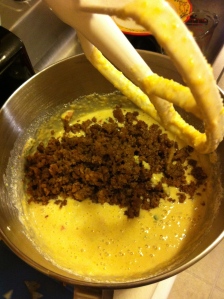
Then add the sausage, onion, peppers & cheese. Stir until combined. Add thyme, and stir again. Pour into muffin pan.

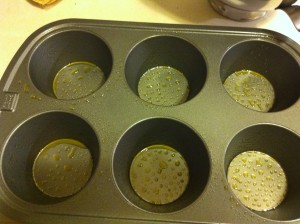
Now, you can use cupcake liners, and this may be neater for transport, but I just sprayed butter flavored PAM into my muffin tin. I also used a large sized muffin pan, instead of the standard cupcake/muffin size. So I needed to add an additional 5-6 minutes to the baking time. I also reduced the heat to 350 from 375 after the first 15 minutes.

Don’t skip breakfast!

  • 12-14 oz. raw breakfast sausage
  • 1 tsp. chili powder
  • ½ tsp. salt
  • ½ tsp. pepper
  • 2 cups Bisquick
  • 1 cup cornmeal
  • 3 eggs
  • 1/4 tsp. garlic powder
  • 1 3/4 cups milk
  • 1/4 cup chopped green bell pepper
  • 1/4 cup chopped red bell pepper
  • 1/2 cup minced onion
  • 1 1/2 cups shredded cheddar cheese
  • 3 tbsp. fresh thyme leaves, finely chopped
  • 1/2 tsp. salt
  • pepper, to taste

Week 5: Alcohol – Mussels in White Wine Sauce

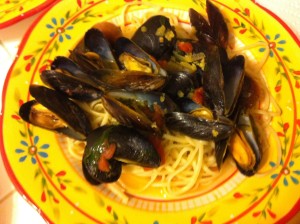
I love Ina Garten! Barefoot Contessa is one of my favorite shows on Food Network. Her style of cooking is just so up my alley, lots of fresh herbs, and bright flavors. I decided to use her recipe from the food network site for this meal. So the first time I ever had mussels was just a few years ago, at my friends Andy & Frank’s house warming party. Frank, was preparing mussels in wine sauce for dinner, and asked if I liked them. I told him I had never tried them, and I wasn’t interested, it didn’t appeal to me. He said I was crazy and very much missing out on a great thing! He convinced me to just TRY one, and the rest of the party attendees joined in, pleading with me, telling me how I would love mussels. So, of course I tried them. And of course I loved them! But the sauce. The sauce, soaked up with a crunchy, crusty, chewy bread. Oh lord, the sauce. Garlic and wine with the salty juices from the mussels. Whoa.

First discard any mussels that are not tightly closed, or the shells are cracked. Then place them in a bowl of water with the flour. Let them sit for 30 minutes while they release any sand they held on to. Drain the water and clean mussels really well, removing any beards. I used a veggie scrubber to clean the shells good.

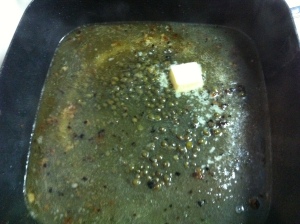
Heat butter and oil in a large pot that you can cover. I used a wok, and then just set the largest stock pot lid I had over the time when it was time. When the oils and butter is heated/melted add shallots, and cook for 3-5 minutes until translucent. Add garlic and cook a minute or two longer. Don’t let the garlic burn though.

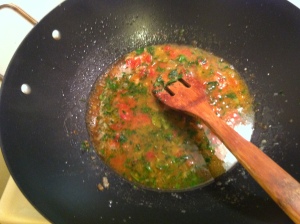
Add the tomatoes, saffron, parsley, thyme, wine, salt, and pepper. Bring to a boil.

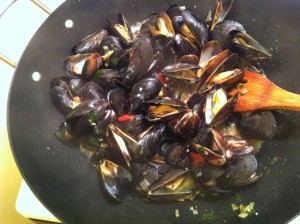
Add the mussels, and make sure to stir them well, to coat with the sauce. Cover with lid and let cook for about 10 minutes, or until all the mussels are open. Throw out any mussels that remain closed. Stir again and serve over pasta (like I did), or with sliced bread.

Here’s what you’ll need!

  • 3 pounds cultivated mussels
  • 1/3 cup all-purpose flour
  • 2 tablespoons unsalted butter
  • 2 tablespoons good olive oil
  • 1 cup chopped shallots (5 to 7 shallots)
  • 1 1/2 tablespoons minced garlic (5 to 6 cloves)
  • 1/2 cup chopped canned plum tomatoes, drained (4 ounces)
  • 1/2 teaspoon good saffron threads
  • 1/3 cup chopped flat-leaf parsley
  • 1 tablespoon fresh thyme leaves
  • 1 cup good white wine
  • 2 teaspoons kosher salt
  • 1 teaspoon freshly ground black pepper

Recipe adapted from Ina Garten at http://www.foodnetwork.com/

Week 4: Pan Fried – Chicken Scallopini

This dish is an old standby. This is what I made the first time I cooked dinner for my boyfriend. Not too plain, but not overly fancy, definitely delicious! I found it years ago in a Cooking Light magazine, and it’s been in my mental recipe box ever since. Surprisingly, I haven’t made it all that often, I seem to forget it’s simple delightfulness. When the pan frying week came up, I knew it was the perfect opportunity to share it.

Clean chicken breasts, and sprinkle with salt, pepper & lemon juice.

Dredge each breast in bread crumbs. I used Italian seasoned panko, but they don’t “stick” as well. It wasn’t a flaw, but if you use traditional 4C’s or something like that, they do coat better.

Add chicken to pan and brown on both sides. The original recipe calls for simply coating the pan with cooking spray, but i used  a few tablespoons of olive oil. Normally olive oil is terrible to use, but I had nothing else in the house, and was unaware of that fact previously. I just kept the heat on the low side and made sure not to burn the oil.

After all the breasts are cooked, set aside and keep them warm, but don’t cover them up or they’ll get soggy! I placed them in a cake pan and put them in the one on low heat. Don’t let them dry out though!

Use the same pan to make the sauce. Add chicken broth and wine, stir and get all the bits up off the pan. After 30 seconds remove from heat and add capers and butter.

Plate the chicken and drizzle with wine sauce. It’s so yummy!

Enjoy!

  • 4 (6-ounce) skinless, boneless chicken breast halves
  • 2 teaspoons fresh lemon juice
  • 1/4 teaspoon salt
  • 1/4 teaspoon black pepper
  • 1/3 cup Italian-seasoned breadcrumbs
  • Cooking spray
  • 1/2 cup fat-free, less-sodium chicken broth
  • 1/4 cup dry white wine
  • 4 teaspoons capers
  • 1 tablespoon butter

Original printable recipe here